How to clean painted walls without damaging the paint
The safest way to clean painted walls is straightforward: dust first, then wash with warm water and a few drops of mild dishwashing liquid, rinse with clean water, and dry immediately. That sequence handles most everyday grime without touching the paint finish underneath.
Before you grab a bucket, run through this checklist:
- Dust the wall from top to bottom with a dry microfibre cloth or vacuum brush attachment
- Mix a few drops of pH-neutral dishwashing liquid into a bucket of warm water
- Fill a second bucket with clean rinse water (the two-bucket method keeps dirty water off the wall)
- Wring your cloth until it is barely damp, not wet
- Test on a hidden spot first, such as behind a door or inside a wardrobe
- Rinse the washed section with clean water, then dry immediately with a fresh cloth
Two cautions before you start: never skip the hidden-spot test, and avoid over-wetting. Professional painters advise that even a small amount of trapped surface dust can act as an abrasive when you apply a wet cloth, which is why dry dusting always comes first.
Common household helpers worth knowing: baking soda (sodium bicarbonate) mixed into a gentle paste works on stubborn scuffs, white vinegar diluted in water cuts through light grease, and melamine foam sponges (sold at Bunnings as generic “magic eraser” pads) remove marks quickly but act by micro-abrasion. Use them sparingly and never on fresh or matte paint. For product guidance specific to your paint brand, Dulux Australia publishes finish-specific care advice on their website.
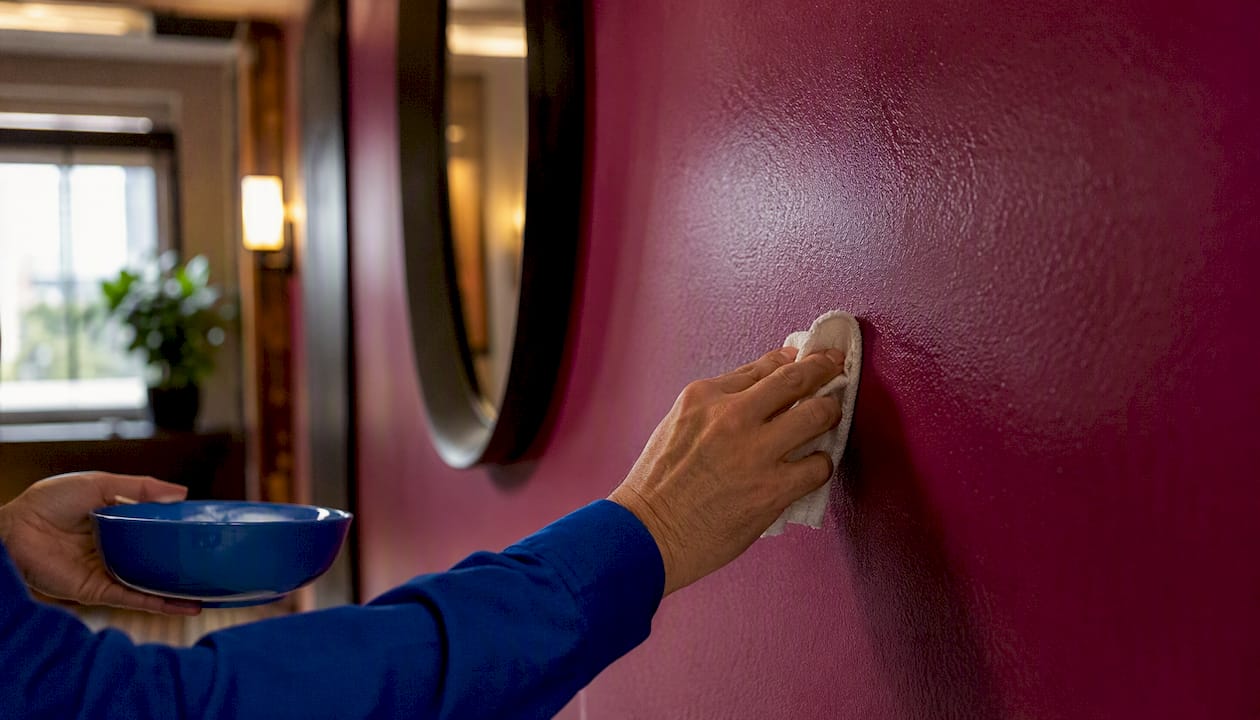
Table of Contents
- What tools and supplies do you need before you start?
- How do you clean painted walls step by step?
- How do you remove common stains from painted walls?
- Which paint finishes can handle cleaning, and which need extra care?
- What should you avoid when cleaning painted walls?
- When does it make sense to hire a professional wall cleaner?
- Key takeaways
- Professional wall cleaning in Melbourne with Carpetsteam Melbourne
- Useful sources and where to buy supplies
What tools and supplies do you need before you start?
Gathering the right gear before you begin saves you from reaching for the wrong thing mid-job.
Essential tools:
- Two buckets (one wash, one rinse)
- Microfibre cloths, at least two or three
- Soft, non-abrasive sponge
- Rubber gloves
- Vacuum with a soft dusting brush attachment, or a dry flat mop for high walls
- Drop sheets or old towels to protect skirting boards and floors
Safe cleaning agents:
- Mild dishwashing liquid (pH-neutral, such as Morning Fresh or Palmolive Naturals, available at Bunnings or any supermarket)
- White vinegar diluted 1:3 with water for light grease
- Baking soda paste (half a cup of baking soda to a quarter cup of water) for spot work on stubborn marks
- Melamine foam sponges: effective but use with caution. Columbus Painting warns they act like microscopic sandpaper and can strip the top layer of finish, particularly on matte or freshly painted surfaces
Optional extras: a small artist’s brush for cleaning around light switches and trim, a rubber-backed knee pad for lower sections, and a step ladder for ceiling-adjacent areas.
| Cleaning agent | Best for | Caution |
|---|---|---|
| Mild dishwashing liquid | General grime, fingerprints | Use only a few drops; rinse thoroughly |
| White vinegar (diluted 1:3) | Light grease, kitchen walls | Avoid on stone surfaces nearby |
| Baking soda paste | Scuffs, crayon, stubborn marks | Rinse fully; test first on matte paint |
| Melamine foam sponge | Scuffs on semi-gloss or gloss | Never use on matte, flat, or fresh paint |
Bunnings stocks all of these supplies. For paint-specific care guidance, check the Dulux website or the back of your original paint tin before you start.
How do you clean painted walls step by step?
Good Housekeeping’s cleaning experts recommend this order: remove dust, wash with mild soap and warm water, rinse, then treat specific stains. Here is how to apply that in practice.
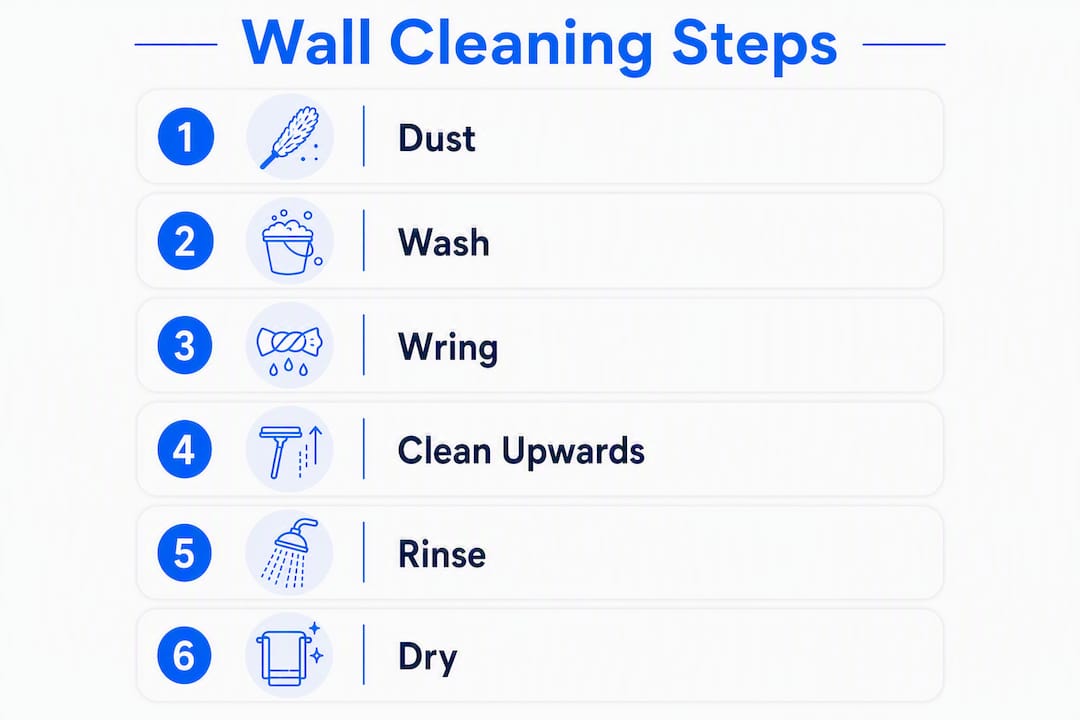
Step 1: Dry dust from top to bottom. Use a vacuum brush attachment or a dry microfibre cloth on a flat mop. Working top to bottom stops loosened dust from settling on sections you have already cleaned.
Step 2: Mix your wash solution. A few drops of dishwashing liquid in a full bucket of warm water is enough. More soap means more residue to rinse off.
Step 3: Wring the cloth thoroughly. It should feel barely damp. Over-saturating is one of the most common causes of streaks and long-term paint damage.
Step 4: Work in small sections, bottom to top. This sounds counterintuitive, but cleaning upward means any drips run onto the dirty section below, not the clean one above. Use gentle circular motions with light pressure.
Step 5: Rinse each section. Dip a fresh cloth in the clean-water bucket, wring it out, and wipe the washed area. Residue left to dry causes dull patches.
Step 6: Dry immediately. A dry microfibre cloth or clean towel prevents water marks and streaking.
Pro Tip: Keep sections small, roughly 60 cm x 60 cm at a time. Larger areas dry unevenly before you can rinse them, leaving tide marks. And if your walls were painted recently, wait at least two weeks before any wet cleaning. Dulux recommends a two-to-four-week curing window before washing freshly painted surfaces.
How do you remove common stains from painted walls?
Different marks need different approaches. Start with the gentlest option and step up only if needed.
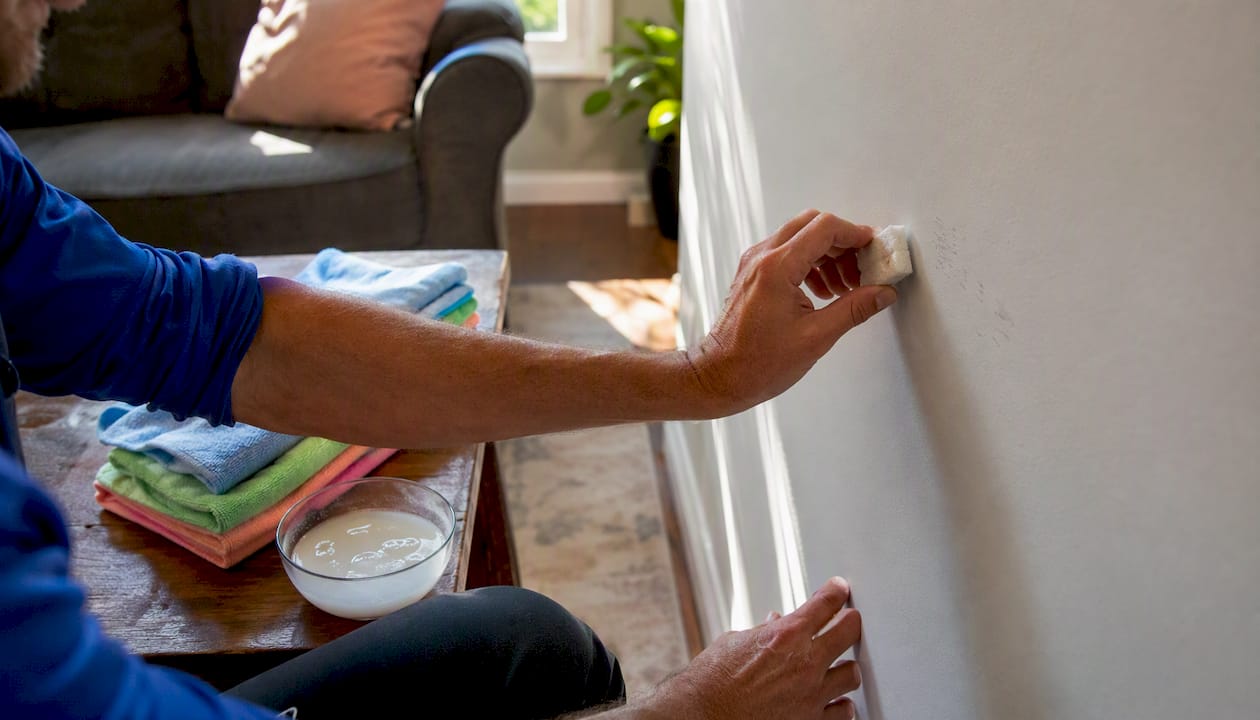
Scuffs and shoe marks: Try a soft eraser first. If that fails, a lightly damp microfibre cloth with a small amount of dishwashing liquid usually lifts it. For stubborn scuffs, apply a baking soda paste (half a cup baking soda to a quarter cup water), rub gently, and rinse immediately.
Grease and kitchen grime: Warm water with dish soap handles most of it. For heavier build-up, a diluted white vinegar solution (1:3 with water) works well on satin and semi-gloss finishes. Always test first on matte or flat paint before applying vinegar.
Crayon and washable marker: Baking soda paste is your first option. If that does not shift it, a small amount of isopropyl alcohol on a cloth, dabbed gently and rinsed immediately, usually works. Avoid strong solvents on matte paint entirely.
Ink and pen: Dab with isopropyl alcohol on a cloth, do not rub, and rinse straight away. If the ink has soaked into the surface, a touch-up with the original paint colour is often the cleaner solution. Keep a small labelled tin of your wall colour for exactly this situation.
Mould and mildew: Spray diluted white vinegar (1:1 with water) onto the affected area, leave for ten minutes, then wipe with a damp cloth. Ventilate the room well while you work. Where mould covers a large area or has penetrated the wall surface, professional remediation is the safer call. You can find more detail on removing every type of wall stain in our Melbourne homeowners guide.
Pro Tip: Glossier finishes tolerate more aggressive stain treatment. On matte or flat paint, stop at the first sign of sheen change or colour lift. A small touch-up is far less noticeable than a scrubbed-out patch.
Which paint finishes can handle cleaning, and which need extra care?
Sherwin-Williams and Benjamin Moore both confirm the same washability hierarchy: high gloss and semi-gloss sit at the top, satin and eggshell in the middle, and matte or flat finishes at the bottom.
- High gloss / semi-gloss: Most washable. Tolerates mild detergent, diluted vinegar, and careful use of a melamine sponge. Common in kitchens, bathrooms, and on trim.
- Satin: Good washability. Mild soap and water handles most marks. Avoid abrasive tools.
- Eggshell: Moderate. Stick to mild soap and a soft cloth. Skip vinegar unless testing first.
- Matte / flat: Least washable. Water and a barely damp cloth only. No vinegar, no melamine sponges, no baking soda paste without a careful test first.
| Sheen | Safest cleaning method | What to avoid | DIY time per 2 m² |
|---|---|---|---|
| High gloss / semi-gloss | Mild soap, diluted vinegar, soft cloth | Abrasive scourers | 20–30 minutes |
| Satin | Mild soap and warm water | Abrasive tools | 20–30 minutes |
| Eggshell | Damp cloth, mild soap | Vinegar without testing | 20–30 minutes |
| Matte / flat | Barely damp cloth only | Vinegar, melamine sponge, baking soda | 20–30 minutes |
Pro Tip: Check your original paint tin or the Dulux website for finish-specific care notes. Manufacturer guidance always overrides general advice, particularly for warranty-sensitive or specialist paints.
What should you avoid when cleaning painted walls?
A few common mistakes cause more damage than the original mark.
Cleaners to avoid:
- Abrasive scourers or steel wool
- Undiluted bleach or ammonia-based cleaners
- Glass cleaners like Windex on matte or flat paint (the solvents strip finish)
- Heavy-duty degreasers unless explicitly recommended by the paint manufacturer
Technique mistakes:
- Over-saturating the cloth or sponge
- Scrubbing hard in one spot instead of using gentle circular motions
- Skipping the hidden-spot test
- Cleaning a large area all at once without rinsing and drying in sections
Safety rules:
- Turn off the power at the switchboard before cleaning around power points and light switches
- Remove switch plates carefully and clean them separately
- Wear rubber gloves when using vinegar or any cleaning solution
- Ventilate the room when treating mould or using any product with a strong smell
For readers interested in how the same principles apply to cleaning interior doors, the approach is nearly identical: mild soap, soft cloth, test first.
Pro Tip: If a wall has a strong mould smell even after surface cleaning, the problem is likely behind the paint. Stop cleaning and call a professional. Scrubbing active mould spreads spores.
When does it make sense to hire a professional wall cleaner?
DIY works well for routine maintenance and isolated marks. A few situations call for something more.
Hire a professional when:
- Mould covers a large area or keeps returning after cleaning
- Walls have widespread smoke or soot damage (fire, candles, or heavy cooking residue)
- You are preparing a property for sale or end-of-lease inspection and need guaranteed results
- The surface is delicate, historic, or has a specialist finish you cannot identify
- A commercial kitchen or aged-care facility needs compliant, documented cleaning
Carpetsteam Melbourne provides trained and insured staff, eco-friendly and chemical-free treatment options, and same-day scheduling for residential and commercial properties across Melbourne. Their teams handle surfaces that DIY methods cannot safely touch, including smoke-affected walls and pre-sale deep cleans.
Rough time and cost comparison:
- DIY small section (approx. 2 m²): 20–30 minutes, low cash cost but your time
- DIY full room: several hours, depending on finish and stain load
- Professional service: typically faster per room with specialised equipment; costs cover labour, equipment, and specialist treatments (pricing varies by job scope)
Questions to ask any wall-cleaning company:
- Are your staff trained and insured?
- What cleaning agents do you use, and are they safe for my paint finish?
- Do you offer a satisfaction guarantee?
- Can you coordinate touch-up painting if needed?
- Do you handle end-of-lease or bond-clean documentation?
Pro Tip: For end-of-lease situations, a professional clean with a written satisfaction guarantee is worth the cost. Property managers in Melbourne increasingly expect documented evidence of professional cleaning, not just a visual result. See our guide to end-of-lease wall cleaning for what agents actually check.
Key takeaways
The safest method to clean painted walls is to dust first, wash with mild dish soap and warm water, rinse, and dry immediately, adjusting your approach to the paint sheen.
| Point | Details |
|---|---|
| Dust before any wet cleaning | Remove surface particles top to bottom first to prevent abrasion when you apply a damp cloth. |
| Match method to paint sheen | Matte and flat finishes need a barely damp cloth only; semi-gloss and gloss tolerate mild detergent and diluted vinegar. |
| Wait for new paint to cure | Dulux recommends two to four weeks before wet cleaning freshly painted surfaces to avoid permanent shiny marks. |
| Keep touch-up paint on hand | Store a labelled tin of your original wall colour for ink stains and scuffs that cleaning cannot fully remove. |
| Carpetsteam Melbourne for larger jobs | Trained, insured teams with eco-friendly methods handle mould, smoke damage, and end-of-lease cleans across Melbourne. |
The part most people get wrong
Most wall-cleaning mistakes come down to one thing: using too much water or too much product, then scrubbing to compensate. The Architectural Digest guidance is worth taking seriously here. Technique matters more than the cleaner you choose. A barely damp cloth and gentle circular motions on a semi-gloss wall will outperform an aggressive scrub with a premium product every time.
The other thing worth saying plainly: matte paint is far more fragile than most people expect. A single pass with a melamine sponge can leave a permanent shiny patch that no amount of cleaning will fix. If you are unsure of your finish, treat it as matte until you know otherwise.
For property managers and landlords, proactive cleaning in high-traffic zones (hallways, around light switches, near doorframes) costs very little time and prevents the kind of build-up that requires repainting at lease-end. A quick wipe-down every few months is genuinely easier than a deep clean once a year.
Professional wall cleaning in Melbourne with Carpetsteam Melbourne
When DIY reaches its limit, Carpetsteam Melbourne is the faster, lower-risk option for property owners and managers across Melbourne. Their trained and insured teams use eco-friendly, chemical-free methods suited to delicate finishes, commercial kitchens, aged-care facilities, and end-of-lease cleans where a written result matters.

Same-day scheduling is available, and every job comes with a satisfaction guarantee. Whether you need a single room treated before a rental inspection or a full commercial property refreshed, the process is straightforward: contact the team, describe the job, and get a quote before anyone sets foot on site.
For tenants preparing to move out, pairing wall cleaning with a full end-of-lease clean gives you the best chance of a full bond return. Get in touch with Carpetsteam Melbourne for a free quote and find out what a professional result actually looks like.
Useful sources and where to buy supplies
- Dulux Australia — finish-specific care guidance and curing time recommendations direct from the manufacturer
- Sherwin-Williams: How to clean painted walls — sheen-by-sheen washability guidance and technique advice
- Good Housekeeping: Clean walls without damage — editorial step-by-step with baking soda, vinegar, and spot-treatment methods
- Architectural Digest: How to clean walls — expert emphasis on technique over product choice
- Carpetsteam Melbourne: Wall cleaning services — professional wall cleaning for Melbourne homes and offices, with eco-friendly options and same-day availability
Where to buy supplies in Australia: Bunnings Warehouse stocks microfibre cloths, soft sponges, white vinegar, baking soda, melamine foam pads, and pH-neutral dishwashing liquid. For paint-specific advice, visit a Dulux trade centre or check the manufacturer’s website before purchasing any specialist cleaner.
For finish-sensitive or warranty-protected surfaces, always consult the paint manufacturer’s guidance first. General cleaning tips are a starting point; the paint maker’s instructions are the authority.
