Grout haze removal: a step-by-step guide for homeowners
Start with a dry microfibre cloth, buff in a circular motion, then switch to a barely damp cloth if the film persists. That clears most fresh haze in under ten minutes. If the residue laughs it off, or you’re working on marble, travertine, or another natural stone, stop and read the tile-type warnings below before reaching for anything stronger.
Three things to check right now:
- Tile type first. Porcelain and glazed ceramic tolerate far more than natural stone.
- Try dry, then damp. Never soak the joints. Excess water pulls polymer straight back out of fresh grout.
- Call a pro if it’s cured or the tile is stone. Some jobs need trade-strength products and mechanical work, not another bottle from the hardware aisle.
Pro Tip: Grout haze is far easier to shift in the first 24 to 48 hours. Wait a fortnight and you may be looking at acid cleaners or a professional polish instead of a five-minute wipe.
Key Takeaways
Grout haze removal works best as a mild-to-strong sequence matched to your exact tile and grout type, attempted within the first 24 to 48 hours.
| Point | Details |
|---|---|
| Start gentle | Dry buff first, then a damp microfibre cloth, before reaching for any chemical cleaner. |
| Timing is everything | Around 90% of haze lifts with a damp cloth if you act within 24 hours of grouting. |
| Know your tile | Never use acid or vinegar on marble, travertine, or other natural stone; it etches permanently. |
| Match cleaner to grout | Cementitious grout tolerates acid on acid-safe tile; epoxy grout needs a dedicated non-acid remover. |
| Respect dwell times | Epoxy haze removers should never sit on grout joints for more than 20 minutes. |
| Call a professional when needed | Com’s insured, eco-friendly tile and grout cleaning handles cured haze and stone restoration DIY methods can’t fix. |
Table of Contents
- What is grout haze and why does it form?
- Tools, PPE, and prep before you start
- Step-by-step grout haze removal methods, from gentle to strong
- How do you choose the right grout haze remover?
- Preventing grout haze on your next tiling job
- When should you call a professional tile cleaner?
- Get a guaranteed result with professional tile and grout cleaning
- Frequently asked questions
- Sources
What is grout haze and why does it form?
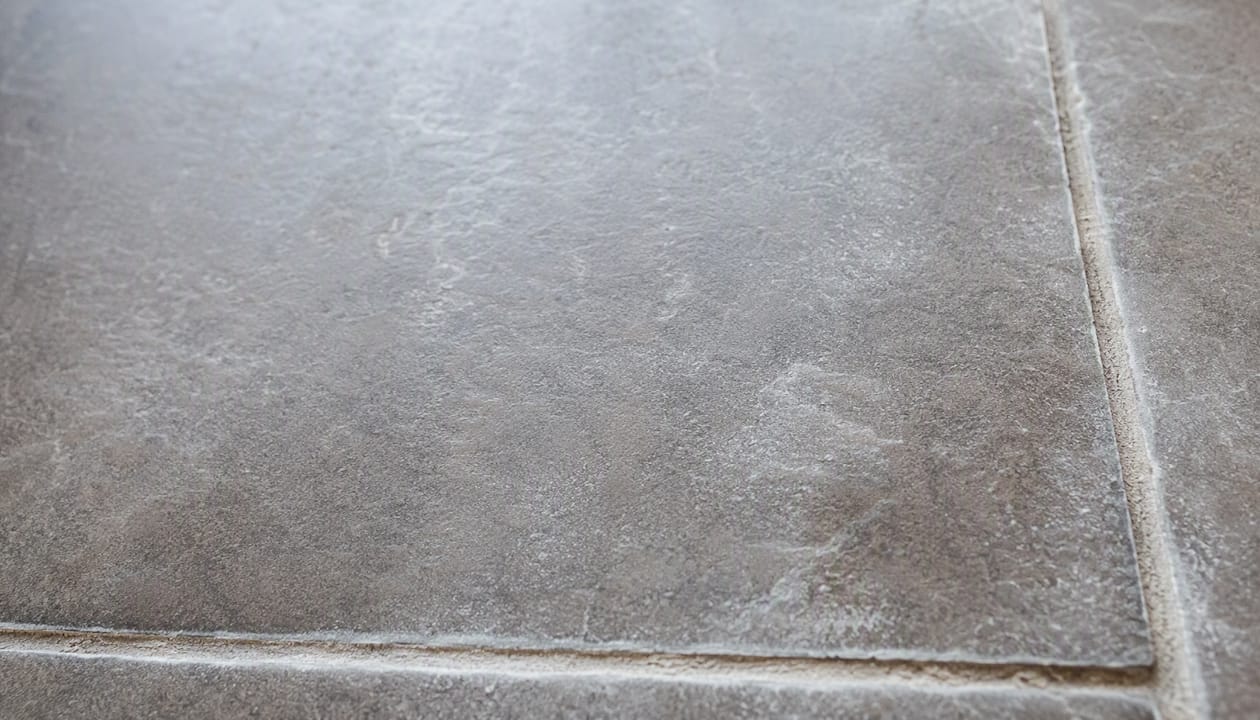
Grout haze is the dried film of cementitious powder or resin left sitting on the tile face after grouting, not a stain, a defect, or dirt tracked in later. It shows up as a chalky white bloom, a dull grey cast, or streaky smears, and it reads differently depending on the tile’s finish. Matte and textured tiles trap it in the surface texture; polished tiles show it as a hazy film that dulls the shine.
The grout you used changes how the residue behaves. Standard cement-based grout dries to a powdery film that responds well to water and mild acids. Ready-mixed, polymer-modified grout leaves a stickier, more stubborn haze. Epoxy and urethane grouts cure into a hard resin skin that needs specialised removers entirely, covered further down.
Tools, PPE, and prep before you start
Gather your kit before you touch a single tile. You want microfibre cloths or cheesecloth, a white nylon scrub pad (never coloured or abrasive pads that can scratch glaze), a rubber grout float for stubborn patches, two clean buckets, and a soft sponge.
- Wear gloves and eye protection any time you’re using a chemical cleaner, and add a mask if you’re working in a small, unventilated bathroom or laundry.
- Open a window or run an extractor fan, particularly with acid-based or solvent products.
- Identify your tile and grout type before you clean anything, then patch-test in an inconspicuous corner.
- Use the two-bucket method: one bucket for clean rinse water, one for wringing out the dirty cloth, swapped often so you’re not smearing haze back onto the tile.
Pro Tip: Overwetting fresh grout is the single most common mistake. Too much water at the wrong stage softens the joint and pulls polymer to the surface, which just creates more haze to clean later.
Step-by-step grout haze removal methods, from gentle to strong
Work through this sequence in order. Skipping straight to acid or a commercial remover on a job that only needed a damp cloth risks etching the tile or bleaching the grout colour unevenly.
- Dry buff. Fold a microfibre cloth into a pad and buff the tile face in small circles. This alone clears a surprising amount of fresh haze, especially within the first day.
- Damp microfibre or cheesecloth. Lightly dampen the cloth, not soak it, and wipe again. Around 90% of haze comes off with a damp cloth within the first 24 hours, which is why timing matters more than any product you buy.
- Rubber grout float or soft sponge. For haze sitting in textured grooves, use the edge of a rubber float at a slight angle across the joint line, not straight down it, to lift residue without dragging it into the grout.
- Mild neutral cleaner. A pH-neutral tile cleaner handles light haze on any surface, stone included, and is the safest first chemical step.
- Diluted white vinegar, porcelain and ceramic only. A weak vinegar-and-water solution can break down cured cement haze on acid-safe tile. Never use it on marble, travertine, limestone, or other calcium-based stone: acid cleaners etch and permanently dull these surfaces.
- Commercial grout-haze remover. For haze that’s sat for a week or more, a purpose-built product like the guidance detailed in Mapei’s technical documentation is built to break the bond acids alone can’t touch. Follow the mild-to-strong sequence recommended across trade and consumer guides alike, escalating only when the previous step has genuinely failed, as BobVila’s removal guide also lays out.
- Epoxy-specific remover. Epoxy and urethane grout won’t respond to acid at all. Use a solvent-based epoxy haze remover, and do not leave it sitting on the grout joints for more than 20 minutes, as it can soften and damage the cured grout itself.
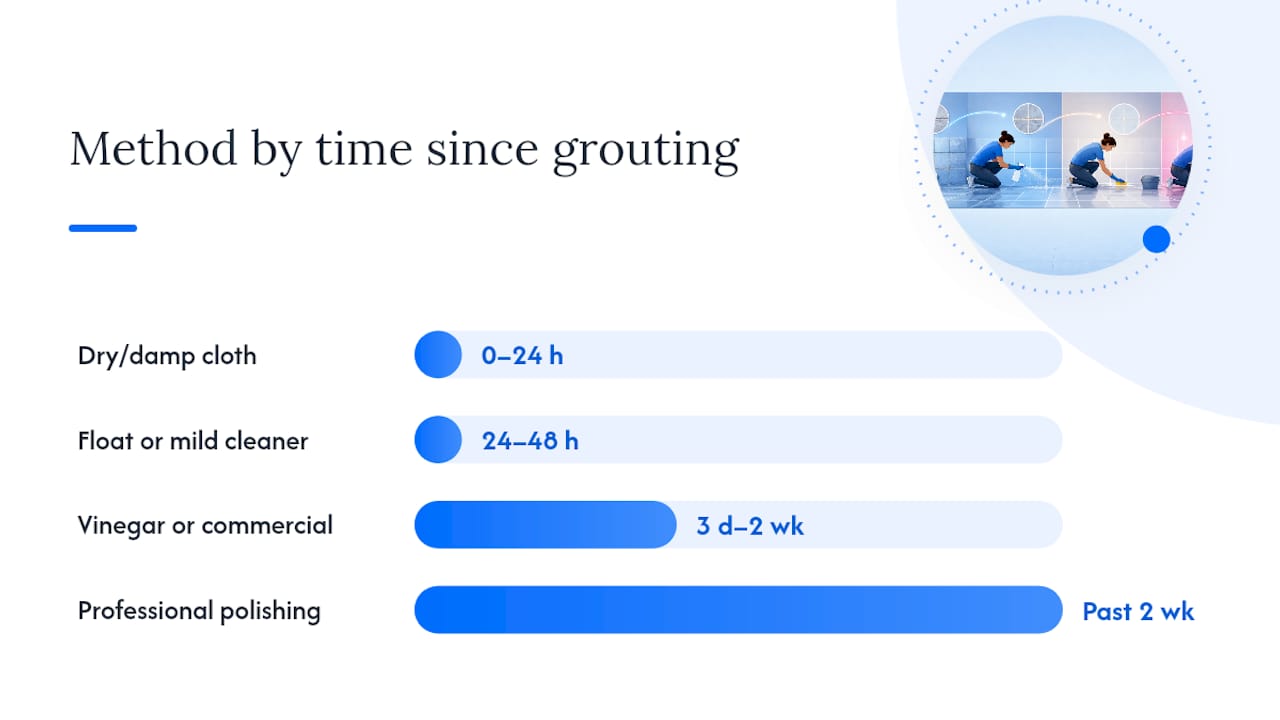
Timing shapes which step you’ll land on. Within 0 to 24 hours, a dry or damp cloth usually finishes the job. From 24 to 48 hours, expect to add the rubber float or a mild cleaner. Between three days and two weeks, dilute vinegar or a commercial remover often becomes necessary on acid-safe tile. Past two weeks, haze has typically fully cured, and stone surfaces in particular may need professional polishing rather than another round of scrubbing.
Whichever chemical step you use, rinse thoroughly with clean water between passes and check the surface has neutralised before applying anything else. Skipping the rinse leaves salt residues behind or lets one product react unpredictably with the next.
How do you choose the right grout haze remover?
Match the cleaner to what’s actually on your floor, not to whatever’s cheapest at the hardware store. Run through this before you buy anything:
- Identify your tile substrate. Porcelain and glazed ceramic handle dilute acids reasonably well. Natural stone, honed or polished, does not.
- Identify your grout type. Cementitious grout responds to acid cleaners on acid-safe tile. Ready-mixed and polymer-modified grout usually needs a product that chemically breaks down polymer first, then a light pass with a non-scratch pad, as trade guidance on ready-mixed grouts explains. Epoxy and urethane grout needs a dedicated non-acid or solvent-based remover, since acids simply won’t touch resin-based grout at all.
- Match cleaner to cure stage. Fresh haze on any tile usually responds to an alkaline or neutral cleaner. Cured cementitious haze on acid-safe tile is where a phosphoric or mild acid cleaner earns its place.
- Act within 24 to 48 hours where you can. Waiting weeks doesn’t just mean more scrubbing, it often means a switch from a single wipe to multiple chemical passes.
- Check the TDS. Every reputable grout and tile manufacturer publishes a technical data sheet listing compatible cleaners. Read it, and patch-test in a hidden spot first regardless of what the label promises.
Preventing grout haze on your next tiling job
The best grout haze removal method is the one you never need. A few habits during installation save hours of cleanup afterwards.
- Work in small sections so grout doesn’t fully skin over before you’ve had a chance to wipe it.
- Wait until the grout is touch-firm, not wet, before the first wipe. Too early and you’ll drag grout out of the joints; too late and the haze sets hard.
- Change your rinse water often. Dirty rinse water re-deposits the very residue you’re trying to remove, turning a five-minute job into an afternoon.
- Wipe cloths at an angle across the joint line rather than straight along it, which stops you scooping grout back out.
- Do a final dry buff once the grout has firmed completely, usually the next day.
- Seal porous natural stone before grouting. A good sealer stops haze bonding into the stone’s surface pores in the first place, which is half the reason stone haze is so much harder to shift after the fact.
Pro Tip: If you’re tiling a splashback or feature wall with a textured finish, keep a spare bucket of clean water on hand purely for rinsing your cloth. It sounds fussy, but it’s the difference between one wipe-down and three.
When should you call a professional tile cleaner?
Some grout haze jobs are genuinely not worth doing yourself. Call a professional when:
- Haze has cured on acid-sensitive stone like marble or travertine and needs honing or polishing to restore the surface, not another cleaning pass.
- You’ve tried the full mild-to-strong sequence and residue is still visible after multiple attempts.
- You’re covering a large area where repeated acid use raises the risk of uneven etching or colour variation.
- Your tiles have a deep textured or slip-resistant finish where slurry has embedded into the surface texture rather than sitting on top of it.
A professional service brings trade-strength, tile-safe products, controlled acid application only where the tile actually tolerates it, and mechanical extraction equipment that lifts embedded residue a cloth simply can’t reach. Most reputable operators will also run a pre-inspection and patch test before committing to a full treatment, and back the result with a service guarantee.
A cleaner’s perspective on the mistakes homeowners make
Timing beats every product on the shelf. Most of the callouts we see aren’t from a bad cleaner, they’re from someone who waited two weeks, then reached for whatever bottle was under the sink, often on a stone floor that never should have seen an acid in the first place. A quick patch test and an honest look at what’s on the floor before you start would fix most of it.
Get a guaranteed result with professional tile and grout cleaning
DIY grout haze removal works well when you catch it early and your tile plays nicely with the methods above. When the haze has cured, the tile is natural stone, or you’d rather not spend a weekend testing chemicals on your own floor, a professional tile and grout clean gets it sorted properly the first time.

Com’s technicians use eco-friendly, chemical-free methods wherever the job allows, and every clean is carried out by trained, insured staff who know which products suit porcelain, ceramic, and natural stone, and which ones to avoid entirely. For heavily bonded residue or larger areas, tile and grout steam cleaning lifts what scrubbing alone can’t shift, without resorting to harsh acids across the whole floor. If your tiles need more than a cloth and a bucket, book a clean and let someone who does this daily handle it.
Frequently asked questions
Can you remove dried or cured grout haze?
Yes, though it takes more effort than fresh haze. Cured cementitious haze on porcelain or ceramic usually responds to a commercial haze remover or dilute acid. On natural stone, cured haze often needs professional honing or polishing rather than a home remedy.
Does vinegar actually work on grout haze?
Diluted white vinegar can break down cement-based haze on porcelain and ceramic tile, and it’s a common household fix recommended in DIY forums like Bunnings Workshop. It should never be used on marble, travertine, or other acid-sensitive stone, where it will etch the surface.
What’s the strongest grout haze remover you can buy?
Purpose-built commercial haze removers, including products in Mapei’s Kerapoxy range and related technical lines, handle stubborn cementitious residue that acid alone can’t shift. For epoxy grout, a dedicated solvent-based epoxy remover is the only option, and it must come off within 20 minutes of application.
How long should I wait before trying to remove grout haze?
Start as soon as the grout is touch-firm, usually within 24 hours of finishing the job. Waiting longer than two weeks generally means switching from a simple wipe to acid cleaners or, on stone, professional polishing.
Is Crommelin Efflorescence Remover suitable for grout haze?
Crommelin’s efflorescence remover, sold through most Australian hardware retailers, is formulated for salt deposits rather than fresh grouting haze, though tradespeople sometimes reach for it on stubborn cement residue on acid-safe tile. Always check the product label and patch-test first, particularly on stone or glazed surfaces.
Sources
For technical dwell times and chemistry, check Mapei’s grout haze removal guide and MatrixGC’s grout removal walkthrough. Always check your product’s own TDS before applying anything to tile, and consult our best tips to clean your beautiful interior doors for safe methods on delicate surfaces.
- Removing grout haze (Mapei product/trade guidance)
- How to remove grout haze (BobVila)
- Grout haze removal (TileFlow UK guide)
- How to Remove Grout Haze (This Old Grout)
- Remove grout from tile: step-by-step guide (MatrixGC)
