How to remove burn stains from carpet: a practical guide
Most surface burn stains on carpet can be improved or removed at home using scissors, rubbing alcohol, or a diluted hydrogen peroxide solution. Melted synthetic fibres or through-burns that reach the backing are a different story — those usually need patching or professional repair. The good news is that the damage tier is easy to assess, and acting quickly makes every outcome better.
Quick action checklist:
- Cool the area immediately (never pour cold water on melted synthetics — let it cool naturally)
- Do not rub melted fibres; you will spread the residue and mat surrounding pile
- Vacuum loose char and ash once the area is cool and dry
- Test any cleaning product on a hidden spot before applying it to the burn
For surface scorches, start with sharp scissors to trim charred tips, then spot-clean with isopropyl rubbing alcohol on a clean white cloth. Hydrogen peroxide (3% strength, diluted further with water) can lift residual discolouration on light-coloured carpet. If the fibres have melted into a hard plastic lump, skip straight to the trimming and patching sections below.
Table of Contents
- How do you know how bad a carpet burn really is?
- How to remove burn stains from carpet: step-by-step DIY fixes
- What to do when synthetic fibres have melted
- DIY patching: how to replace a small burned section
- When should you call a professional carpet repairer?
- Immediate response checklist and prevention tips
- Key takeaways
- A carpet cleaner’s honest take on DIY burn repairs
- Carpet Steam Melbourne can handle what DIY can’t
- Useful sources and where to get help
How do you know how bad a carpet burn really is?
Getting the assessment right saves you from either under-treating a serious burn or over-treating a minor scorch. There are three tiers.
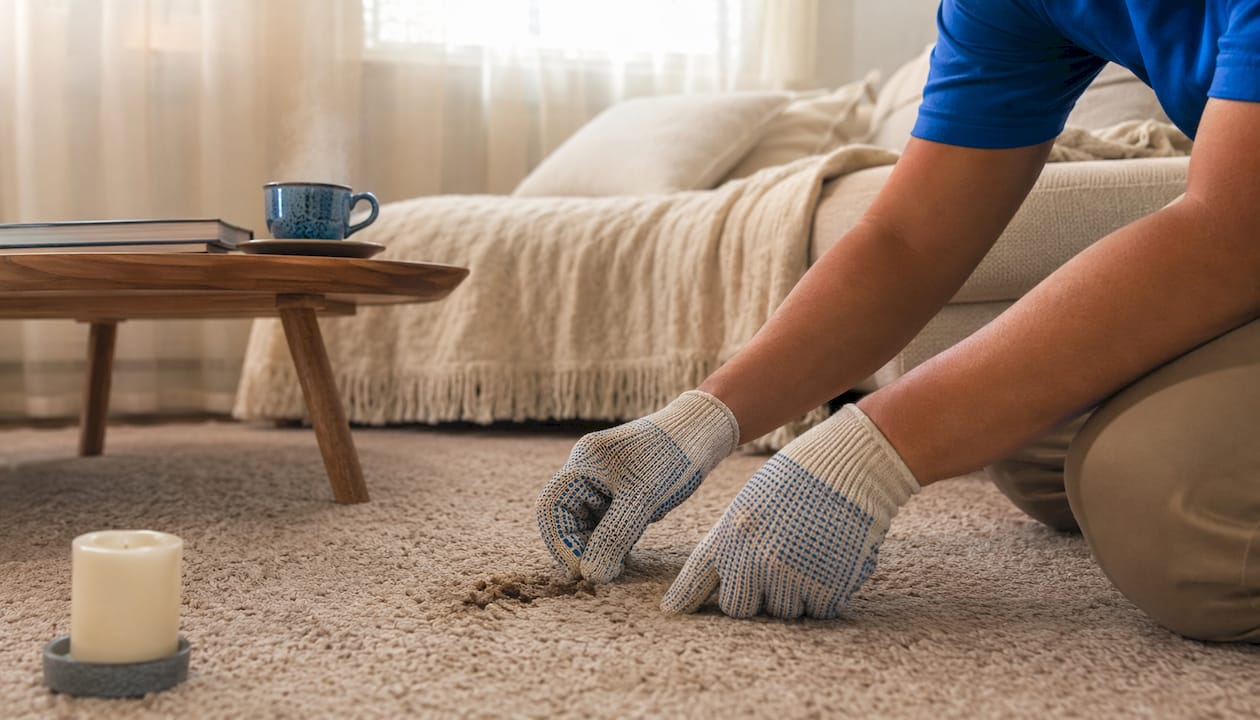
Tier 1 — Surface scorch: Only the very tips of the fibres are affected. You will see darkened or ashlike residue (common with wool), and the pile springs back when pressed. This is the easiest fix and often responds to trimming alone.
Tier 2 — Melted fibres: Synthetic carpets (nylon, polypropylene, polyester) do not char — they melt into hard residue. The affected area feels rigid or crunchy. Cleaning will not restore the texture; the fibres are structurally gone. Trimming reduces the visual impact, but a bald spot may remain.
Tier 3 — Through-burn or hole: The damage has reached the backing or subfloor. You can see or feel a depression, or the carpet lifts away. This tier needs patching or professional repair.
Assessment checklist:
- Press the area gently — does the pile spring back (Tier 1) or feel hard (Tier 2)?
- Check for a hole or depression in the backing (Tier 3)
- Measure the affected area in centimetres — larger burns are harder to disguise with trimming alone.
- Note the pile height and fibre type (check the manufacturer label on the back of a spare offcut)
- Consider the location: a burn in a high-traffic hallway or centre of a room is far more visible than one under a desk
Not every black mark is a heat burn. Friction or rubber residue from dragged furniture or vacuum belts can look identical but requires a solvent (mineral spirits work) rather than trimming. Treating a rubber mark with scissors achieves nothing.
Pro Tip: To identify fibre type quickly, trim a tiny sample from a hidden edge and hold it briefly near (not in) a flame. Wool chars and crumbles to ash with a smell like burnt hair. Synthetics melt, bead, and smell like burning plastic. This tells you immediately whether cleaning or replacement is the right path.
How to remove burn stains from carpet: step-by-step DIY fixes
These steps work for Tier 1 surface scorches and very shallow Tier 2 marks where only the tips have melted. Gather your supplies before you start.
Supplies you need:
- Sharp scissors (nail scissors or embroidery scissors are ideal)
- Fine-grit sandpaper (180–220 grit)
- Isopropyl rubbing alcohol (70% or higher)
- Hydrogen peroxide (3% pharmacy-grade)
- Clean white cloths or paper towels
- Melamine sponge (such as a Magic Eraser or generic melamine foam)
- Small vacuum or handheld vacuum
- Gloves and ventilation
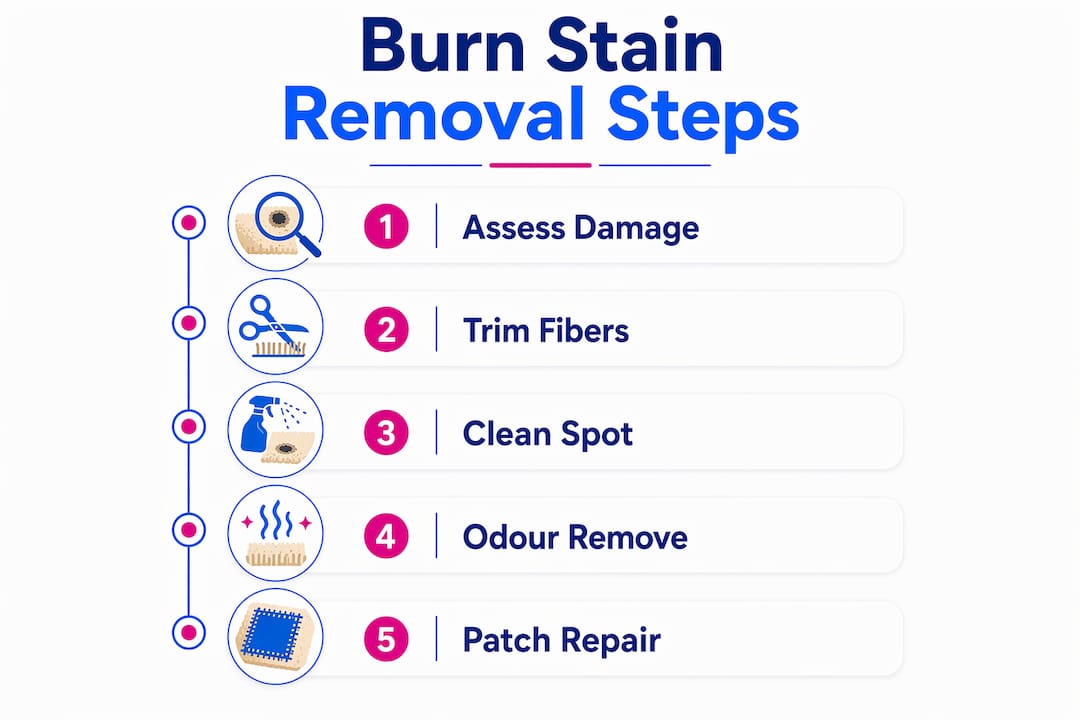
Step-by-step process:
- Vacuum the area to remove loose ash and char before touching anything. Rubbing loose debris into the pile makes the stain worse.
- Trim charred fibre tips with sharp scissors, cutting as little as possible. Work slowly — you can always trim more, but you cannot put fibres back. Trimming and light sanding significantly improves appearance before any cleaning product is applied.
- Sand lightly with fine-grit sandpaper if dark residue remains after trimming. Vacuum again.
- Test your cleaning product on a hidden area (inside a wardrobe, under a sofa) and wait five minutes for any colour change before proceeding.
- Apply rubbing alcohol to a clean white cloth and dab the stain gently, working from the outer edge inward. Never scrub — blot and lift. Replace the cloth as it picks up residue.
- Try hydrogen peroxide for remaining discolouration on light-coloured carpet. Mix one part 3% hydrogen peroxide with ten parts water, soak a cloth, and blot the mark. Rinse with cold water and blot dry. Do not use undiluted peroxide on dark or patterned carpet — it can bleach the dye.
- Use a melamine sponge (dampened, not soaking) for any stubborn surface residue. Apply very light pressure; melamine foam is mildly abrasive and can thin pile if you scrub hard.
- Dry thoroughly. Blot with a dry cloth, then allow the area to air dry completely before vacuuming again to restore pile direction.
Pro Tip: Work from the edge of the burn inward, using minimal product each pass. Over-wetting the backing loosens the adhesive that holds the carpet together, creating a new problem on top of the original one. Document the hidden test area with a photo so you can compare colour accurately.
If a smoke smell lingers after cleaning, removing carpet odours after repair work is a separate step worth addressing before the area dries completely.
What to do when synthetic fibres have melted
Melting is fundamentally different from charring, and treating it the same way wastes time. When synthetic fibres fuse, the pile is gone — no amount of cleaning restores the texture. What you can do is reduce how obvious the damage looks.
Short-term fixes for melted fibres:
- Trim the fused tips with sharp scissors, cutting flush with the surrounding undamaged pile. This removes the hard, discoloured lump and creates a slightly lower but even surface.
- Scrape away hard residue with a blunt-edged tool (a butter knife or the back of a spoon). Work carefully and avoid pulling at surrounding fibres.
- Iron method (for some cases): Place a clean, dry white cloth over the melted area and press briefly with a warm iron. This can very slightly soften and lift fused fibres before you trim. Test on a hidden spot first — too much heat on a synthetic carpet makes things worse, not better.
- Comb the pile with a small metal comb after trimming to blend the edges with surrounding fibres.
The honest limit here: if trimming leaves a visible bald patch, cosmetic fixes will not disguise it. A bald spot in a high-traffic or visible area needs a patch. A small depression in a low-traffic corner under furniture may sometimes be acceptable as-is.
Never apply steam directly to freshly melted synthetic fibres. Steam can re-soften the residue and spread it into surrounding pile, enlarging the damaged area.
DIY patching: how to replace a small burned section
Patching is the right move when trimming leaves a bald spot or when the burn has gone through to the backing. Done carefully, a small patch is nearly invisible. Done carelessly, it looks worse than the original burn.
Tools and materials:
- Sharp utility knife or seam cutter
- Spare carpet offcut (from installation leftovers or a hidden area)
- Carpet adhesive or double-sided carpet tape
- Seam roller or rolling pin
- Backing patch (optional, for through-burns)
- Ruler and marker
Step-by-step patching process:
- Square the damage. Use a ruler and utility knife to cut a clean rectangle or square around the burned area. Straight, clean edges are critical — ragged cuts create visible seams.
- Cut the donor patch. Use the removed damaged piece as a template and cut an identical piece from your spare offcut. Cut slightly oversized, then trim to fit exactly.
- Match nap direction. Before applying any adhesive, place the patch in the hole and check that the pile leans the same direction as the surrounding carpet. Nap direction is the single biggest factor in whether a seam is visible — even a few degrees of rotation creates a shadowed box effect that catches every light angle.
- Apply adhesive. Spread carpet adhesive evenly around the edges of the hole and on the backing of the patch. For small patches, double-sided carpet tape is a cleaner option.
- Press and roll. Set the patch in place, press firmly, and run a seam roller (or a rolling pin) over the edges to bond them. Work from the centre outward.
- Allow cure time. Keep foot traffic off the area for at least a few hours, longer if the adhesive manufacturer recommends it.
- Blend the edges. Trim any proud fibres with scissors and use a comb to blend the patch edges into surrounding pile.
For very small burns, fibre transplantation is often a better option than cutting a full patch. Harvest individual fibres from a concealed area, apply a tiny drop of clear adhesive to the bald spot, and press the fibres in. Trim to match height once dry. This works best on low-pile carpet.
Pro Tip: Always check you have matching spare material before making any irreversible cuts. Technicians consistently flag mismatched fibres and poor cutting as the main reasons homeowners end up calling a pro anyway. If you have no offcut, harvest from inside a wardrobe or under a built-in — somewhere the thinning will never be seen.
When should you call a professional carpet repairer?
Some burns are genuinely beyond a DIY fix, and attempting them anyway usually creates a larger, more expensive problem. Here is when to stop and call someone.
Call a pro when:
- The burn has gone through the backing or you can see the subfloor
- The affected area is large across
- You have no matching spare carpet and the burn is in a visible location
- Previous DIY attempts have left a mismatched or raised patch
- The carpet is wool, silk, or a high-value fibre where a mistake is costly
- The burn is in a high-traffic area where an imperfect patch will wear unevenly
What professionals do differently:
Professionals use seam rollers, specialist adhesives, and colour-matching techniques that are difficult to replicate at home. They can also re-roll and steam the repaired area to restore texture and blend the pile height. For very small burns, skilled technicians use fibre transplantation (re-tufting) to achieve results that are virtually undetectable. After any patch repair, a professional steam clean helps the repaired area settle and match the surrounding carpet’s texture and sheen.
Typical Australian costs and timelines:
Ballpark pricing varies by carpet type, location, and whether donor material is needed. A small patch repair (under 10 cm) from a Melbourne-based professional typically runs in the range of $80–$200 for the repair itself, with a steam clean of the broader area adding to that depending on room size. Larger repairs or those requiring colour-matching and donor material sourcing will cost more. Same-day inspections are available from some providers. Always ask for a written quote and before/after photos from previous jobs before committing.
What to check before hiring:
- Trained and insured staff (ask directly)
- Satisfaction guarantee in writing
- Before/after photos of comparable repairs
- Written quote with no hidden call-out fees
Pro Tip: Professionals avoid visible seams by carefully aligning nap direction, using seam rollers to press edges flat, and sometimes heat-retexturing the repaired area with a steam tool. If a quote does not mention nap alignment, ask about it — it is the detail that separates a clean repair from an obvious patch.
For a broader view of whether DIY steam equipment or a professional is the right call, this comparison covers the trade-offs clearly.
Immediate response checklist and prevention tips
The first five minutes after a burn event have more impact on the final outcome than anything you do later.
Immediate do/don’t checklist:
- Do let the area cool completely before touching it
- Do vacuum loose char and ash once cool
- Do photograph the damage before treating it (useful for insurance and for matching repairs)
- Don’t rub melted fibres — you will embed residue and mat surrounding pile
- Don’t apply hot steam to freshly melted synthetic fibres
- Don’t use cleaning products without testing on a hidden spot first
- Don’t walk on the area until loose debris is removed
Prevention tips worth keeping:
Use heat-resistant mats under hair straighteners, curling irons, and clothes irons. A dropped straightener on bare carpet can cause a Tier 2 melt in under two seconds. Stable candle holders on hard surfaces (not carpet) eliminate one of the most common burn sources. Keep a small carpet offcut from installation stored flat in a dry spot — it is invaluable for future patching and costs nothing to keep.
Pro Tip: The best places to harvest donor fibres later are closet edges and the carpet under built-in furniture that will never be moved. Mark the location with a small piece of tape on the skirting board so you can find it again in two years when you need it.
Key takeaways
Surface burns are often fixable at home with scissors, rubbing alcohol, and hydrogen peroxide; melted or through-burns need patching or professional repair, and nap alignment is the single factor that determines whether a patch is invisible or obvious.
| Point | Details |
|---|---|
| Assess the damage tier first | Surface scorch, melted fibres, and through-burns each need a different approach — misreading the tier wastes time and can worsen the damage. |
| Start with trimming, not chemicals | Trim charred tips with sharp scissors before applying any cleaning product; sanding and vacuuming follow trimming, not the other way around. |
| Test before you treat | Apply rubbing alcohol or diluted hydrogen peroxide to a hidden spot first — colour loss from peroxide on dark carpet is irreversible. |
| Nap direction makes or breaks a patch | A donor patch rotated even a few degrees creates a visible shadow box; always align pile direction before pressing the patch down. |
| Carpet Steam Melbourne for pro repairs | Trained, insured technicians offer patch repairs, seam work, and steam retexturing with same-day inspection options across Melbourne. |
A carpet cleaner’s honest take on DIY burn repairs
The mistake most homeowners make is not attempting the repair — it is attempting it without first checking whether they have matching material. Small burns of modest size are genuinely fixable at home. The same burn, patched with a slightly different dye lot or with the pile running the wrong way, looks worse than the original damage and is now harder for a professional to fix cleanly.
The other thing worth saying plainly: act fast, but do not rush. Vacuuming loose char immediately is smart. Grabbing scissors and cutting into the carpet before you have assessed the damage tier, checked your fibre type, or located a spare offcut is where things go wrong. Two minutes of assessment saves two hours of regret.
Photograph the damage before you touch it. Photograph the hidden test area. Keep those images. If you end up calling a professional, those photos help them quote accurately and choose the right repair method before they arrive.
Carpet Steam Melbourne can handle what DIY can’t
When the burn is too deep, too wide, or in too visible a spot to risk a DIY patch, Carpet Steam Melbourne’s trained and insured team can step in. The service covers on-site inspection, small and moderate patch repairs, seam work, steam retexturing after repair, and full replacement referrals when the damage warrants it. All methods are eco-friendly and chemical-free, which matters if you have children, pets, or allergy sensitivities in the household.

Send through photos of the damage for a fast quote — the team can often assess repair options from images before booking an inspection. Same-day inspections are available across Melbourne, including carpet steam cleaning in Melton and surrounding suburbs. For a written quote with no hidden fees, visit carpetsteammelbourne.com.au or call to book directly.
Useful sources and where to get help
Internal guides from Carpet Steam Melbourne:
- How to remove set-in carpet stains at home — practical stain-lifting steps useful after burn treatment
- How to remove carpet odours — for smoke smell lingering after a burn repair
- Carpet cleaning methods and products — overview of professional cleaning approaches
External references:
- productsafety.gov.au — Australian product safety guidance for heating appliances and household goods
- fire.nsw.gov.au — Fire and Rescue NSW guidance on household fire prevention
- Tom’s Guide: 7 methods for burn marks on carpet — practical method overview including iron and straightener burns
- Williams Carpet Care: burnt carpet repair guide — detailed repair steps including fibre replacement and patching
Book a professional inspection or quote:
carpetsteammelbourne.com.au
