Wash walls before painting: the quick, correct prep method
Yes, you need to wash walls before painting in almost every room. Skip it and you risk peeling, streaking or a blotchy finish once the paint dries. The one rule that matters most: wash, then rinse, then dry completely before any primer touches the surface. Rinsing removes the cleaner itself, and drying gives paint something stable to grip.
- Wash with sugar soap or mild detergent for everyday grime
- Rinse with clean water until no suds remain
- Dry thoroughly before painting; in humid rooms, allow longer drying times
Key Takeaways
Paint adhesion depends on three steps done in order: washing to remove contaminants, rinsing to remove the cleaner, and drying fully before priming.
| Point | Details |
|---|---|
| Wash, rinse, dry | Follow this exact order every time, skipping rinse or drying causes most paint failures. |
| Match cleaner to problem | Use sugar soap for grime, TSP substitute for kitchen grease, diluted bleach for mould. |
| Dust before wetting | Vacuum or dust dry first so water doesn’t turn loose dirt into mud. |
| Don’t trust visual dryness | Humid rooms need fans and overnight drying, moisture hides under the surface. |
| Book a pro for scale | Com’s insured wall cleaning service handles heavy grease, mould or full-property jobs with guaranteed drying and prep. |
Table of Contents
- Tools and materials for washing walls before painting
- Step-by-step process to wash walls before painting
- Which cleaner suits your wall’s problem
- Why rinsing and drying matter more than most DIYers think
- When professional wall cleaning is worth booking
- If you’d rather book a pro: what our wall cleaning service covers
- Frequently asked questions
- Sources
Tools and materials for washing walls before painting
You don’t need a trade kit, but a few specific items make the job faster and stop you from smearing dirt instead of lifting it. Grab two buckets (one for washing, one for rinsing), a non-abrasive sponge, microfibre cloths, a vacuum with a soft brush attachment, a step ladder, and drop sheets to protect floors.
For cleaners, stock sugar soap (Selleys Original is the go-to Australian brand), mild dishwashing liquid, a TSP substitute or degreaser for greasy kitchen walls, and household bleach diluted for mould treatment. Gloves, eye protection, and decent ventilation aren’t optional extras when you’re using anything stronger than dish soap.
- Two buckets, sponge, microfibre cloths, soft-brush vacuum, ladder, drop sheets
- Sugar soap, mild detergent, TSP substitute/degreaser, diluted bleach
- Gloves, safety glasses, open windows or a fan running
Pro Tip: Buy sugar soap as a concentrate rather than pre-mixed wipes. It’s cheaper per wall and you control the strength, which matters if you’re working on old plaster that marks easily.
Step-by-step process to wash walls before painting
Clear the room of furniture where you can, and lay drop sheets along the skirting. Turn off power to any outlets you’re working near and pull off switch plates so water doesn’t get behind them.
- Dry dust first. Run a vacuum with a soft brush attachment or a long-handled microfibre duster over the whole wall. Skipping this step turns loose dust into mud the moment you introduce water.
- Mix your cleaner according to the label. A stepwise checklist that trade painters follow is dust, wash, rinse, dry, in that exact order.
- Wash in small sections, working bottom to top with a damp, well-wrung sponge rather than a dripping one. This stops rinse water streaking sections you’ve already cleaned and avoids over-soaking plaster or joint compound.
- Rinse immediately with a separate bucket of clean water. Change that water as soon as it turns cloudy, or you’re just redepositing grime.
- Let the wall dry fully. Open windows, run a fan or the exhaust, and give humid rooms overnight if needed.
- Check the surface for anything a wash reveals, flaking paint, small holes, chalking, and sand or fill before you prime.
Pro Tip: Don’t judge dryness by eye. A wall can look dry on the surface while moisture sits in the plaster underneath, and painting over that causes blistering weeks later.
Which cleaner suits your wall’s problem
The right cleaner depends entirely on what’s on the wall, not just how dirty it looks.
- General grime, handprints, dust film: sugar soap or a mild detergent solution handles most living areas and bedrooms without fuss.
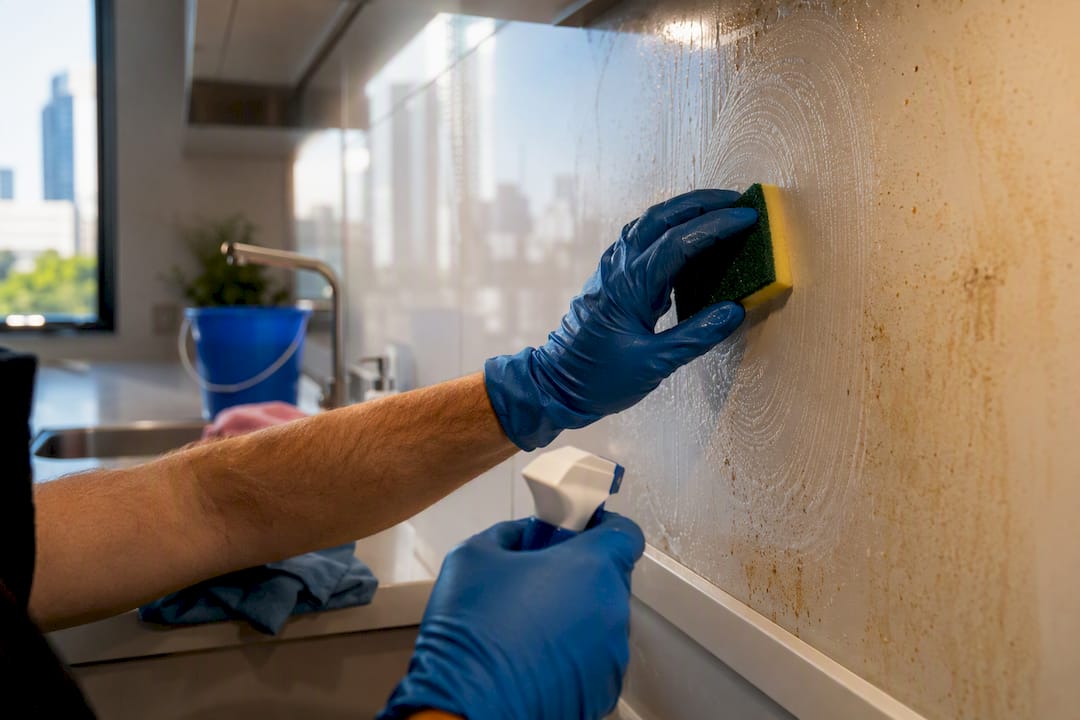
- Kitchen grease and cooking film: reach for a degreaser or TSP substitute, and treat the whole kitchen, not just the splashback zone behind the stove. Grease travels further than it looks.
- Bathroom mould and mildew: use a dedicated mildew cleaner or diluted bleach, approximately one part bleach to several parts water, and keep the room ventilated while you work.
Never mix bleach with ammonia or other cleaning products. The fumes are dangerous, and it won’t clean any better for the risk. Whatever you use, rinse thoroughly afterwards, strong cleaners left on the surface cause just as many adhesion problems as the dirt they removed.
Why rinsing and drying matter more than most DIYers think
Rinsing is the step most people skip, and it’s the one that causes the most callbacks. Leftover cleaner, especially TSP, interferes with paint adhesion just as badly as the grime it was meant to remove. A Sherwin-Williams prep guide backs this up: any residue left behind can stop paint bonding properly, no matter how clean the wall looks.
- Rinse with a separate clean bucket, wiping until no suds show
- Swap the rinse water as soon as it clouds, don’t keep using dirty water
- Run fans or open windows, and allow overnight drying in humid bathrooms or laundries
Pro Tip: If you’re painting a bathroom, wait longer than you think you need to. Trapped humidity behind tiles and around extractor fans keeps walls damp long after they feel dry to touch.
When you can skip the full wash
Not every wall needs a wet wash. If a bedroom or hallway wall is low-traffic and free of grease, smoke film or sticky residue, a thorough dust is usually enough. Check high-contact zones first, around light switches, door frames and stair rails, since these often carry hidden grime the rest of the wall doesn’t.
- Visible grease, smoke, stickiness or mould: full wash required
- Clean, low-traffic bedroom or ceiling: dusting is usually enough
- Always check switches, frames and rails before deciding
Safety steps and mistakes that ruin paint jobs
Ventilate the room whenever you’re using bleach, TSP or a strong degreaser, and never combine cleaning products. Wear gloves and eye protection as a baseline, not an afterthought.
- Washing top to bottom causes streaking, always work bottom up
- Skipping the rinse leaves residue that stops paint bonding
- Painting over a damp wall invites blistering later
- Widespread mould, chalking, or flaking paint need specialist attention, not another coat of sugar soap
When professional wall cleaning is worth booking
Some jobs go well beyond a bucket and sponge. Extensive grease build-up, heavy or recurring mould, high ceilings, exterior render, or an end-of-lease clean that has to meet a landlord’s standard are all situations where a professional saves you time and rework. NSW Health’s guidance on mould is blunt about this: spores and hidden growth can persist and reappear under fresh paint if they aren’t properly killed first, not just wiped over.
A professional brings insured staff, specialist equipment, and guaranteed drying and preparation, which matters if you’re on a tight painting schedule. If you’re weighing up DIY versus professional wall cleaning, the deciding factor is usually scale: one wall, do it yourself; a whole property before sale or handover, book it.
- Heavy grease or smoke damage across multiple rooms
- Persistent or widespread mould
- High or hard-to-reach ceilings and exterior walls
- End-of-lease jobs needing a guaranteed standard
What most DIYers get wrong
The two mistakes I see most often are rushing the drying time and treating the rinse as optional. Both save ten minutes on the day and cost hours of touch-ups later. Professional preparation tends to avoid this entirely, because drying and rinsing are built into the process rather than squeezed in at the end.
If you’d rather book a pro: what our wall cleaning service covers
Com is the practical alternative to the bucket-and-sponge weekend for anyone who wants the wash, rinse and dry done properly the first time. Our technicians use eco-friendly, chemical-free methods, work fully insured, and back every job with a satisfaction guarantee, so you’re not left guessing whether the wall was rinsed properly before the painter arrives.

A typical wall washing visit covers dusting, targeted treatment for grease or mildew, a full rinse, and guaranteed drying time, exactly the sequence painters need before they prime. It’s especially useful for property managers preparing a unit between tenants, where wall cleaning before a sale or handover has to meet a strict standard on a tight turnaround. Same-day options are available for jobs across Melbourne homes and offices, so a painting contractor isn’t left waiting on prep. If your next project involves more wall than one weekend can handle, get in touch through our carpet steam cleaning Melton booking page to check availability and get a quote before you commit to a painting date.
Frequently asked questions
Do you need to wash walls before painting, or is dusting enough?
Most walls need a wash, but a clean, low-traffic bedroom wall with no grease or marks can sometimes get away with a thorough dust instead.
What’s the best way to wash walls before painting a kitchen?
Use a degreaser or TSP substitute across the whole kitchen, not just visible splash zones, then rinse thoroughly before drying.
Can I use household bleach to clean walls before painting?
Yes, for mould and mildew, diluted at a diluted bleach solution, approximately one part bleach to several parts water. Ventilate the room and never mix it with ammonia or other cleaners.
How long should walls dry after washing before I start painting?
Allow walls to dry fully before painting, with longer drying times in humid areas. Don’t rely on how the wall looks, moisture can linger under the surface.
Sources
Always check the product label before mixing or applying any cleaner, manufacturer instructions override general advice.
